1. Understand the two field contexts
When you create a custom field for Contacts, Joomla asks which context it belongs to:
- Contact – fields shown on the contact's detail page (e.g. an extra bio line, a Skype ID, a department name).
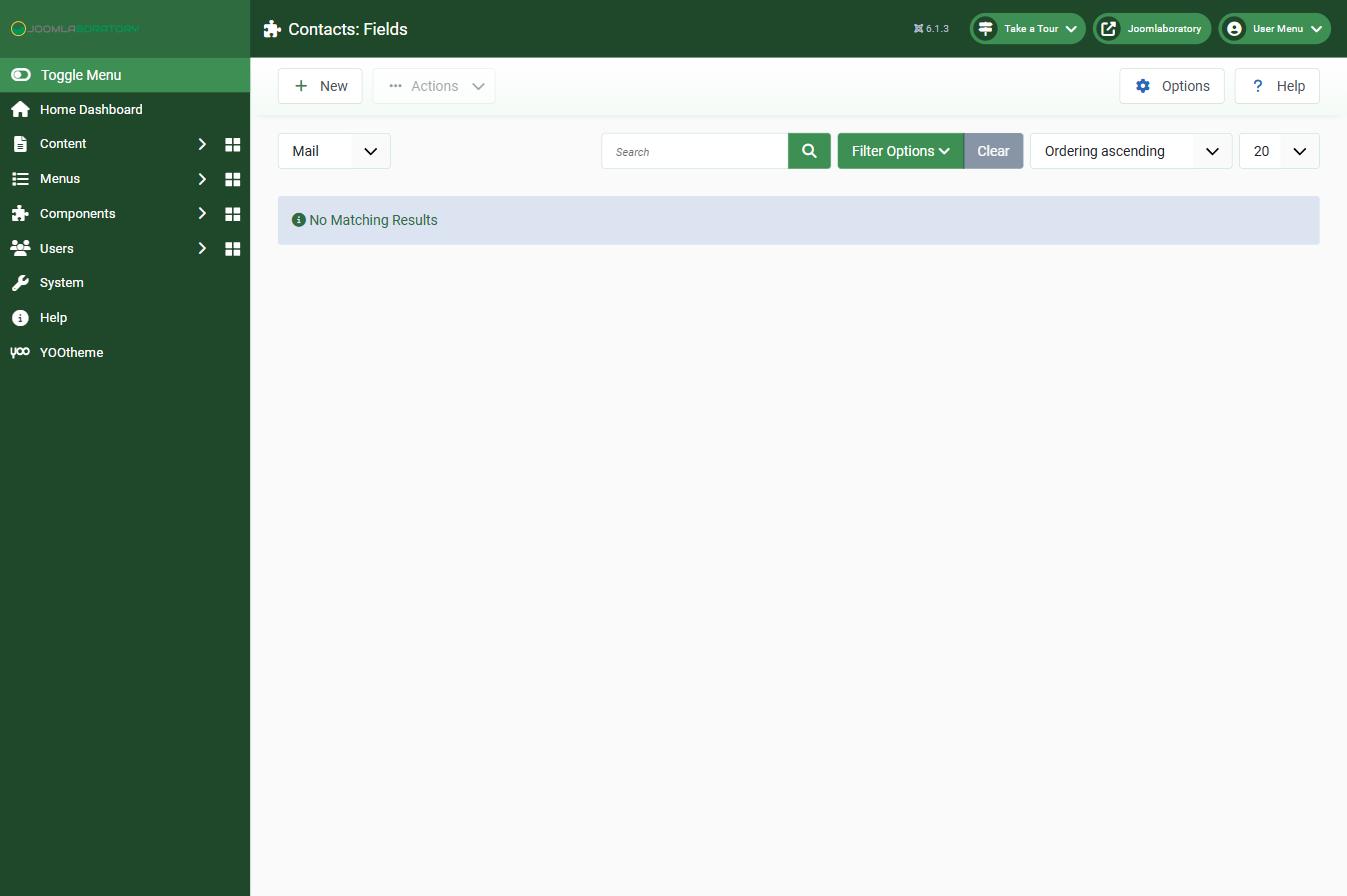
- Mail – fields shown on the "Send an Email" form that visitors fill in and submit. This is the one you want if your goal is to add extra fields to the contact form itself.
Mixing these up is the most common reason a new field "doesn't show up" — always double-check you selected Mail.
2. (Optional) Create a Field Group
Grouping fields keeps things tidy if you plan to add several.
- Go to Components → Contacts → Field Groups.
- Click New.
- Set the Context to Mail.
- Give it a title, e.g. "Extra Contact Details".
- Save & Close.
This step is optional — you can create fields without a group — but it's recommended once you have more than two or three fields.
3. Create the custom field
- Go to Components → Contacts → Fields.
- Make sure the Mail context is selected in the filter/dropdown at the top.
- Click New.
- On the General tab:
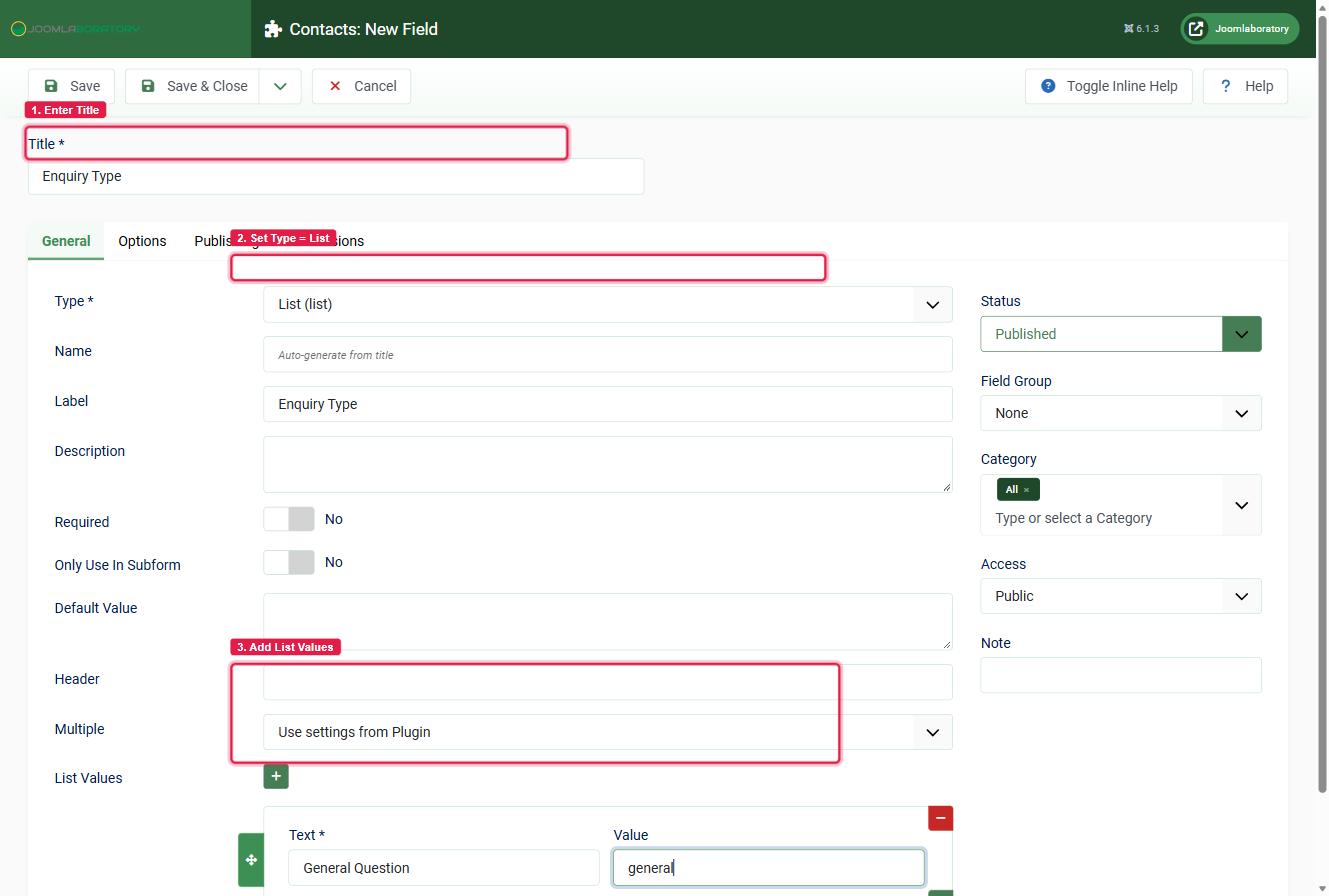
- Title – the label visitors will see, e.g. "What is your enquiry about?"
- Type – choose this first, since several other options depend on it. Joomla ships with roughly 15 built-in types, including Text, Textarea, Editor, List, Radio, Checkboxes, Checkbox, Calendar, Color, Email, Url, Integer, Media, Subform, and Note (For this example we will add a list of option for the visitor to select).
- Field Group – assign it to the group you created (if any).
- Description – shown as help text under the field.
- Default Value, Required – set as needed.
- If you picked List, Radio, or Checkboxes, a Field Values area appears where you enter Value/Text pairs for each option.
- On the Options tab, you can control label position, whether the field is shown, and where it renders relative to the rest of the form.
- Save & Close (or Save & New if you're adding several fields).
4. Set permissions — the step people forget
By default, Joomla does not allow unauthenticated (guest) visitors to submit values for a custom field. If you skip this, the field will either not appear on the frontend or will silently fail to save.
- Edit the field again.
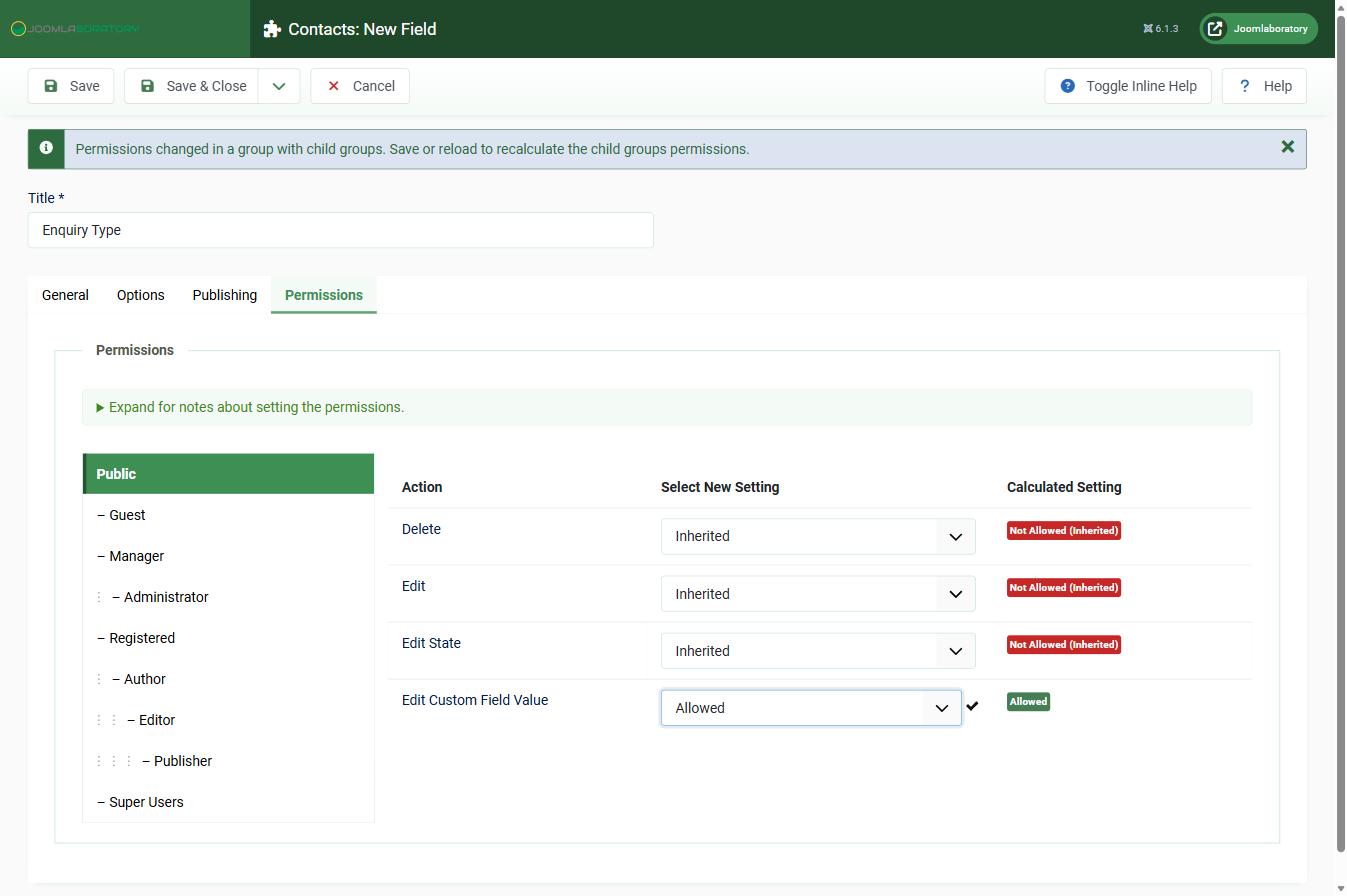
- Open the Permissions tab.
- Find Edit Custom Field Value.
- Set it to Allowed for the Public user group.
- Save.
5. Publish the field
Make sure the field's Status is set to Published (toggle the green checkmark in the Fields list). An unpublished field never appears on the form, even if everything else is configured correctly.
6. Test it on the frontend
Open the page that shows your contact form and confirm the new field appears. Submit a test message and check that:
- The field renders correctly for a logged-out visitor.
- Required fields actually block submission when left empty.
- List/checkbox options display as expected.
7. Make sure the field data shows up in the email
Custom field values are only included in the notification email if the mail template contains the right placeholder.
- Go to Components → Contacts → Options → Mail tab.
- Look at the Email Text area.
- Confirm it includes the
{CUSTOMFIELDS}placeholder tag (most current installs include it by default; add it manually if it's missing). - Save.
Once this is in place, all custom field values submitted through the form appear automatically under a "Custom Fields" section in the email you receive.
8. (Advanced) Change where a field renders on the form
By default, custom fields are rendered at the bottom of the Mail form. If you need a field in a specific spot — say, right after the "Subject" field — you'll need a template layout override:
- Copy
components/com_contact/tmpl/contact/default.phpfrom your Joomla installation into your template at:templates/YOUR_TEMPLATE/html/com_contact/contact/default.php - Inside that file, custom field values are available as
$this->item->jcfields. You can loop through them and echo the ones you want in a specific position, using Joomla'sFieldsHelper::render()to output an individual field:
<?php
use Joomla\Component\Fields\Administrator\Helper\FieldsHelper;

// Render one specific field by its name/alias, anywhere in the layout
if (!empty($this->item->jcfields)) {
    foreach ($this->item->jcfields as $field) {
        if ($field->name === 'enquiry-type') {
            echo FieldsHelper::render(
                'com_contact.mail',
                'field.render',
                ['field' => $field]
            );
        }
    }
}
Only touch this if you're comfortable maintaining a template override across future Joomla updates — for most sites, the default bottom-of-form placement is fine.
9. Troubleshooting checklist
If a field isn't behaving as expected, check these in order:
- Wrong context – field created under "Contact" instead of "Mail" (or vice versa).
- Permissions – "Edit Custom Field Value" not set to Allowed for Public.
- Unpublished field or field group.
- Cache – clear Joomla's cache (System → Clear Cache) after making changes; contact form fields can be cached on some configurations.
- Field values missing from email –
{CUSTOMFIELDS}tag missing from the Mail options template. - Third-party template override – an old override of
com_contactin your template folder can hide new core rendering; checktemplates/YOUR_TEMPLATE/html/com_contact/for stale files.
That covers adding, permissioning, positioning, and troubleshooting extra fields on the Joomla 6 contact form using only core functionality — nothing here requires updating when you upgrade Joomla, since it relies on the standard Fields component rather than a plugin hook.


